Tuesday
Jan222019

The Cloud and My Data

What is the Cloud? In simple terms, the cloud or cloud computing is a form of storing and accessing data through the internet instead of your computer’s hard drive. A good example of this would be your online banking app, which connects you to a secure network where your banking information is stored. Considering the January release of AgExpert Accounting, we thought a blog that talks about how FCC has addressed some of your concerns is timely.

Is my data secure?

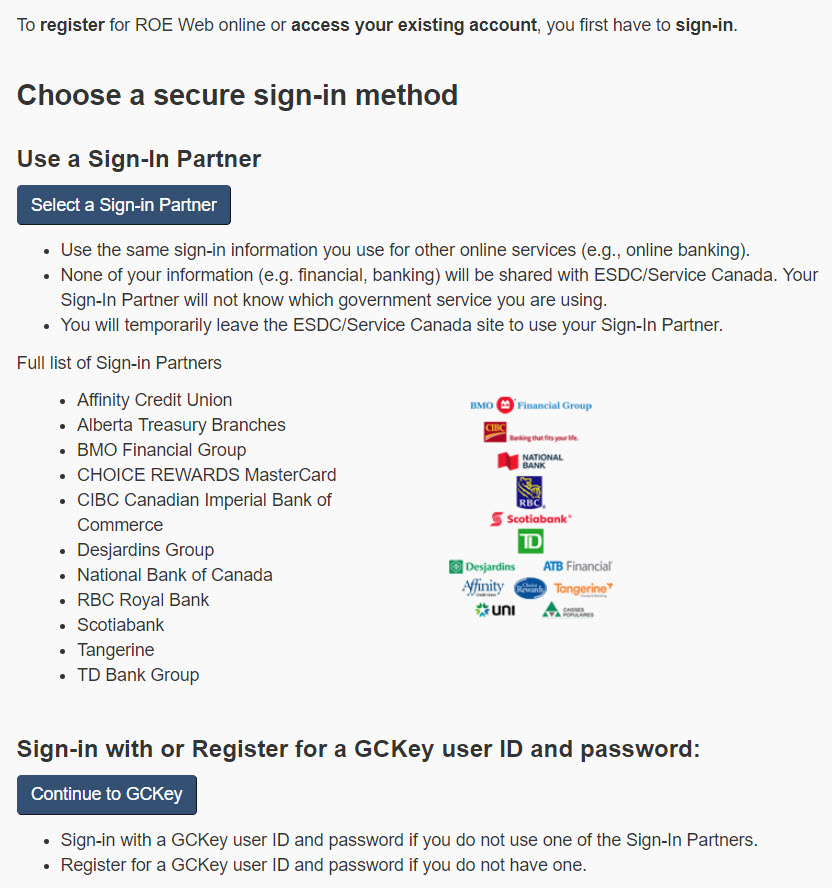
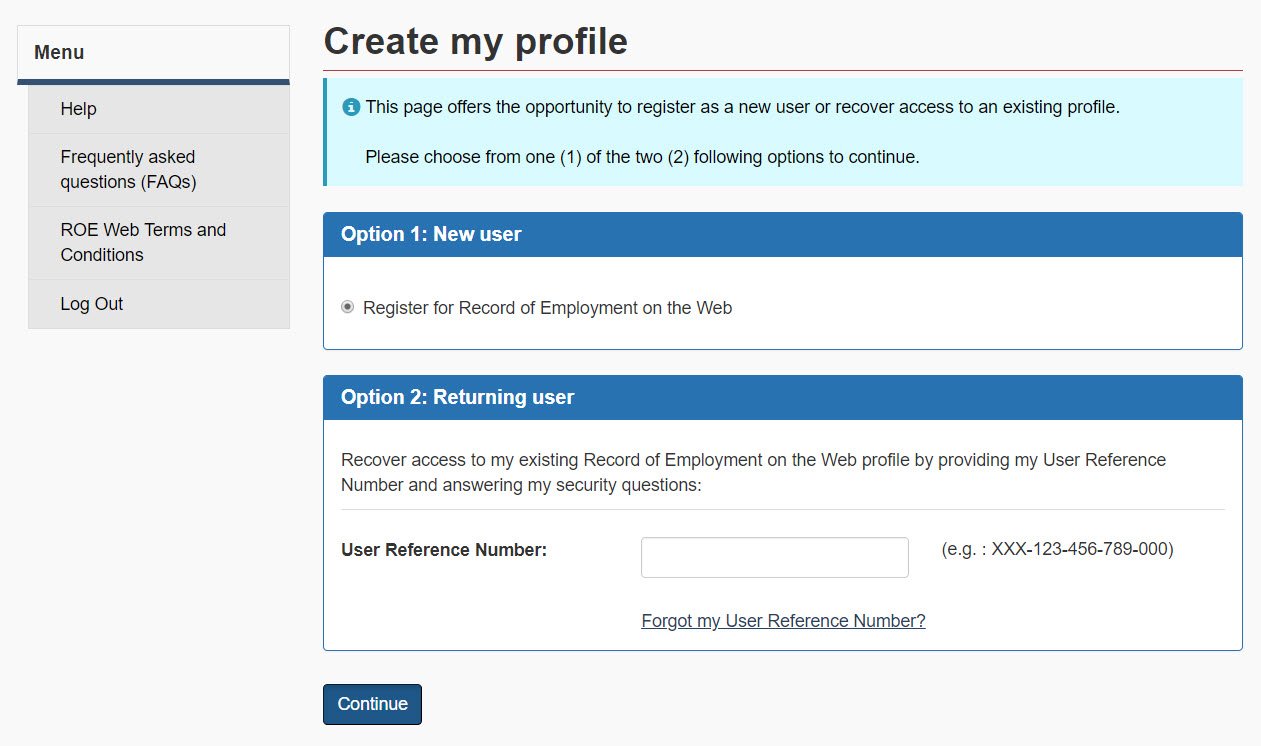
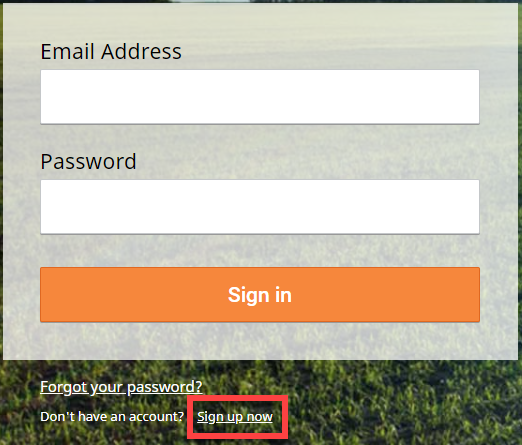
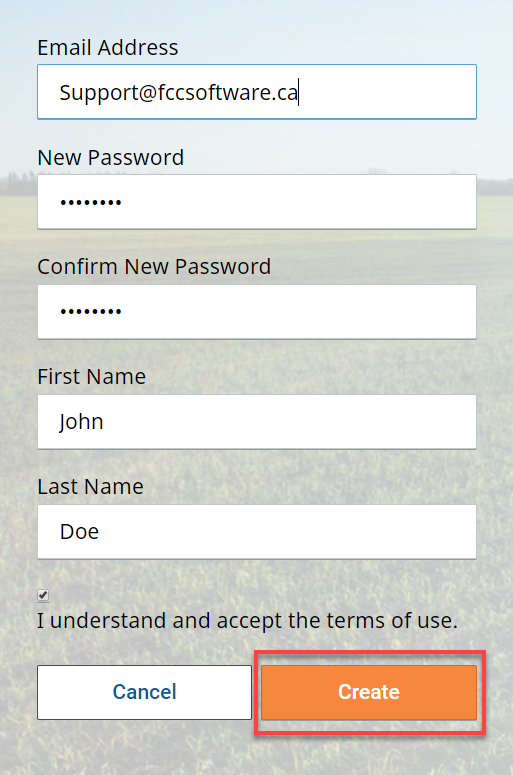
For your protection, we require that you log in to secure your connection to our website. Once you have successfully logged in, look for the padlock symbol in the address bar to confirm that your connection is secure:    

Windows 10 includes a top-notch anti-virus and firewall that is working to protect your computer from intruders. If you are not using a Windows 10 computer, we recommend installing a personal firewall as well as anti-virus protection software. Visit FCC’s website for more tips on how to protect your computer

Who can access or use my data?

FCC AgExpert is certified AgData Transparent. AgData Transparent is a non-profit organization out of the U.S. formed to safeguard the privacy and security of your agricultural data in the cloud. FCC AgExpert is the first Canadian company to obtain their seal of approval. You can find out more about the process to become Ag Data Transparent by visiting their website.

You are the owner of your data. FCC will not share your agricultural data without your consent or sell your data to any third party.

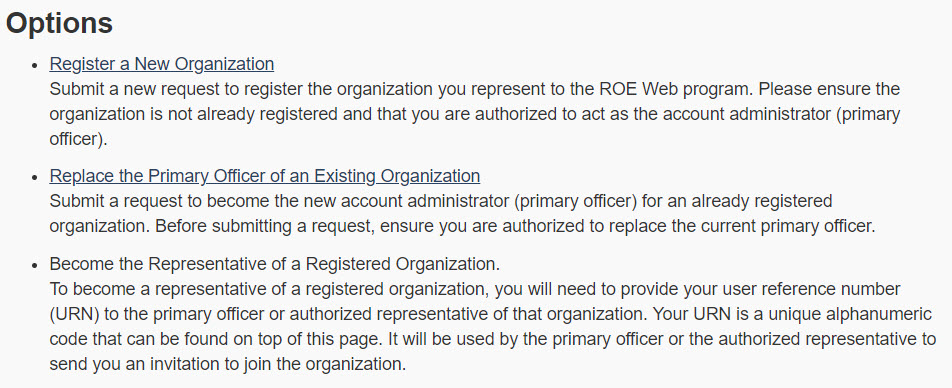
You may share your data with specified advisors such as your agronomist, accountant or crop consultant. These advisors must receive an invitation from you in order to access your data and must also have an AgExpert.ca account in order to access your information. You may stop sharing your data at any time by revoking their permission. If you share your data with a third party, your use is subject to that third parties’ policies and contract terms.

What are the benefits of storing my data in the cloud?

  • No more backups! We’ll make sure that your data is safe and available to you when you need it.
  • No more being tied to the office! Access your data anywhere, any time, from any device.
  • No more complicated software update installation. 

If you have questions we didn’t answer here, call our FCC AgExpert support team at 1-800-667-7893.


Tuesday
Nov202018

Benefits

Why offer additional benefits to your employees? Farmers that decide to offer additional benefits such as dental and vision benefits, retirement savings plans, or health and disability insurance are more likely to attract new workers and retain current employees. There are countless types of benefits you could offer your employees, but we will only talk about a few today.

Why offer vision and dental benefits to your employees?

Offering vision and dental benefits is not mandated but these types of benefits have a great value-add to your employees. There is flexibility when offering these types of benefits; you can choose the coverage, whom it will cover and the rate you are wanting to cover. Types of coverage include:

  1. Full Coverage
  2. Minor Coverage
  3. Basic coverage

You can select one of the following when deciding who you will offer the benefit to:

  1. Employee
  2. Employee and their spouse
  3. Employee and their dependents

Covering your employees and their dependents can have a great impact, as most children require regular dental and vision checkups, they would be able to utilize their benefits to the fullest.

It will be up to the employer to decide if they want to cover a percentage of the premium rate, or a flat rate off the employee’s paycheque per pay period.

Insurance 

Insurance can be a scary word for some but can be very beneficial to your operation. The benefits of offering insurance such as basic life, drug or disability can ease your employees’ minds. They know that if they were to ever be injured while on the job, they wouldn’t have to stress about money. If something were to happen to them, their family would be taken care of.

It is up to the employer to decide what types of insurance they would like to offer. Types of insurance include but are not limited to:

  • Health insurance
    - Single
    - Family
  • Disability insurance
  • Prescription drug coverage

Savings Plans

Canadian Pension plan

The CPP is a pension plan that provides contributors and their families with a partial replacement of their earnings in case of retirement, disability, or death. 4.95% of an employee’s income is deducted from their paycheque and is matched fully by the employer for a total contribution of 9.9% of total income. *This will be changing as of January 1, 2019, to 5.1% and increasing every year for the next several years. Quebec is the only province to have opted out of the CPP, and instead has the Quebec Pension plan. The QPP is almost identical to the CPP, except that the contribution rate is higher at 10.8%. 

Contributors are eligible to receive the full pension at age 65, or they can choose to receive it as early as age 60 with a reduction, or as late as 70 with an increase. Employees can choose to continue working while receiving their pension until the age of 70. The AgExpert Analyst Software deducts the CPP contributions from a paycheque automatically as part of the payroll process. The total of both these deductions is what’s sent to the Canada Revenue Agency.

It should be noted that the AgExpert Analyst software is currently unable to automatically determine whether an employee is eligible for CPP contributions based on their date of birth. Employees under the age of 18 and employees collecting CPP payments do not make CPP contributions.

Private Pension Plan

Employers can choose to supplement the CPP by setting up a private pension plan for their employees. This is like CPP, in that the employer usually matches the employee contributions either fully or partially. There are two types of pension plans, defined benefit plans and defined contribution. In the defined benefit plans, the pension payments to the employees are fixed amount that does not change no matter what. In the defined contribution model, the pension payments can vary depending on the market performance of the fund.

Essentially, in a defined contribution plan, the employee takes on market risk, while in a defined benefit plan, the employer assumes the risk as they will have to pay out the pension and payments no matter how the fund is performing in the market. Another option can be a group RRSP which is similar to a pension plan. 

For step-by-step instructions about how to setup new benefits or pay types for your employees in AgExpert, visit our online community. You can also visit the CRA website.


Tuesday
Oct162018

Choose how you'd like to contact us

Pick up the phone
If you like to call with questions, you may have noticed that our phone systems have changed. You don’t have to leave a voicemail and wait patiently for someone to call you back. Now you can hold for the next available support analyst or request an automatic callback. This means that you keep your place in line and your call is returned in the order it was received. You can even schedule your callback request for a specific block of time to ensure that we’re calling back when it’s convenient for you. Give us a call at 1-800-667-7893. 

Of course, you don’t always have to call
We want to make sure things are convenient for you. When you don’t require an immediate answer over the phone, you have options:

  • Have a quick question during business hours? Use our Click-to-Chat tool. It’s easy to use and allows us to connect to your screen and see what you’re working on when it’s necessary.
  • Have a complex problem? We can give you detailed written instructions. Just email your question to support@fccagexpert.ca.
  • Want to hear from others who use AgExpert software? You can crowd-source answers to questions any time with our Online Community Discussion Boards. You can post questions there and get notified by email when someone replies. We often respond to the posts, and you might get a reply from AgExpert Analyst Certified Advisors, Field Manager PRO Consultants and other industry professionals as well. This space is for users to help each other – there’s no substitute for real-world experience. 

Feel free to tweet!
If your mobile device and social media apps are your jam, we’re happy to announce that you can now contact us on Twitter! Direct Message us using @FCCAgExpert and we’ll get back to you with the answer to your question.


Tuesday
Sep182018

.NET Framework 4.7.2 update

You may have noticed that when you are trying to install AgExpert Analyst 2018-03 or Field Manager PRO/360 2019-01 you receive a pop-up message asking you to install a 4.7.2 .NET Framework update. This is not a virus! It is simply a security update developed by Windows that we now require to be installed before downloading the updated version of AgExpert Analyst.

.NET Framework 4.7.2 can be installed on the following versions of Windows only. If you have an older version of Windows it is recommended to upgrade as soon as you can.

  • Windows 10 Creators Update
  • Windows 10 Fall Creators Update
  • Windows 10 Anniversary Update
  • Windows 8.1
  • Windows 7 SP1

If you are unsure what version of Windows you have on your computer follow these steps:

  1. Press the Windows key on your keyboard and the letter R at the same time. This will launch the Run window.
  2. Type Winver and click OK. 

OR

Windows 8 or newer: 

  1. Click on the Windows Start buttin
  2. Type About your PC in the search box and select About your PC.  

Windows 7 or earlier: 

  1. Right-click on My Computer on your desktop or from the Start menu. 
  2. Select Properties

You may also be able to determine what version of windows you are using based on the style of the Home button. 

  • Windows 10 

  • Windows 8.1

  • Windows 7 

  • Windows Vista

  • Windows XP
     

To check for windows updates on Windows 10, 8.1 and 8 follow these steps:

  1. Go to your computer settings. You can find your settings by searching “settings” in your search bar.
  2. Select Update & Security


  3. Select Check for updates in the grey box. 


  4. Your computer will then check for new updates. 

It is important that your Windows is always up to date. Often when you turn off your computer these updates are automatic but sometimes these updates will fail which is why it is always good to check that you are up to date.

For Windows 7: 

  1. Click on the start menu and then Control Panel.
  2. Select System and Security. 
  3. Select Windows Update. 
  4. Check for updated by clicking on the “Check for updates” button.

If you do not have access to the internet on the computer in which AgExpert Analyst is installed, you can download it onto a USB stick from a computer that is connected using the offline installer. You can then transfer the update onto the desired computer.

To Save the offline installer to a USB stick follow these steps:

  1. Select one of the download links, for either Windows RT 8.1 or all Windows operating systems except Windows RT 8.1.

  2. Click on the down arrow beside Save and select Save as. 
  3. You will now find your USB stick and click Save. Take the USB stick out and plug it into the computer without internet access. 
  4. Open your USB stick ad find the .exe file and double click on it to begin the download. Once the download is complete you can install AgExpert Analyst 2018-03.


Thursday
Aug162018

What is a Record of Employment, and when should I give one to my employees?

A Record of Employment (ROE) is the form used to report insurable earnings and hours to Service Canada after an employee has been terminated or placed on leave. Take farm hands who only work for part of the year such as during harvest, for example. When their work is completed they probably won’t return till next harvest season; in cases like these this employee would require a ROE. AgExpert Analyst lets you print the information needed to complete ROEs for the government and your employees. (The report created in AgExpert Analyst should not be submitted directly to Canada Revenue Agency.)

If you issue ROEs by paper, they must be issued within five days of the first day of an interruption of earnings. You will give Part 1 to your employee (typically the white copy), Part 2 to Service Canada (blue copy), and keep Part 3 for your records (yellow copy). If a ROE is issued electronically, and the pay period is monthly or 13 pay periods per year, you must issue the ROE by the earlier of 5 days after the end of the pay period or 15 calendar days after the first day of an interruption of earnings.

Whether your ROE is issued by paper or electronically, it is very important that all related payroll records be stored for six to seven years.

If you choose to issue your ROE electronically you can do so using the ROE Web on the Service Canada website.

  1. Sign in or register for ROE Web online before beginning. You can either select a sign-in partner or a GCKey. 

  2. Select your sign-in partner or GCKey and log in using your existing login number or user ID and password. Once that is complete, you will have to agree to the terms and conditions. Scroll down to the bottom of the page and select I Agree.
  3. If you are a new user to ROE Web, select Option 1. If you are a returning user, select Option 2.


  4. Enter all necessary information to create your profile.

  5. Once your registration is complete, you will receive a reference number via email. It is very important to keep this number in a safe location as you will need it to confirm your identity as a ROE Web user.

  6. You will then have the option to register a new organization, replace the primary officer of an existing organization or become the representative of a registered organization.
     
  7. After choosing one of the three options, you will have to fill out the blanks of your Record of Employment. On the Government of Canada website you can find block by block instructions that will provide descriptions and details on each block of the ROE form.
Tuesday
Jul172018

Let's Talk About Mental Health 

This month’s AgExpert post is a little different. Instead of focusing on spreadsheets and ratios, we’re turning our attention to the people side of agriculture – to everyone who loves this business as much as we do.


This unpredictable, amazing industry

Here’s a rhetorical question for you: Have you ever noticed how volatile and complex agriculture is? It’s so unpredictable. The difference between profit and loss can depend on the smallest of factors – a little rain, a ripple in trade, a slight increase in cost. It’s especially hard when the factors are out of your control, yet the decisions still fall to you. It feels like make-or-break time.


A commitment to all producers

Hard work, resilience, strength and a sense of community have always been the hallmarks of life on the farm, but there are also times when producers feel frustrated and anxious. We’ve seen the scenario play out. We know it sometimes results in the worst possible outcome. That’s why we’re determined to help end the stigma of speaking out.


Talk more. Ask more. Listen more.

You may recall that in June we announced our partnership with Do More Agriculture. This foundation champions the mental well-being of Canadian producers and is working to help all producers feel encouraged, supported and empowered. Its founders are spotlighting a discussion that has been in the shadows for far too long. Their proposal is simple – talk, ask, listen – and reminds us we don’t have to go it alone.


Take action now

So, if you’re reading this and thinking, “That sounds like my neighbour,” or “I’m feeling some of those things,” please act now. Connect to the Do More Ag site for a list of people whose job it is to help, on the phone or by email. If you or someone you love is feeling stressed, angry, hopeless or isolated and is struggling, don’t ignore it. Talk about it. Suggest a visit for coffee, or even a trip to the local clinic. And if you sense there’s immediate risk, go to an emergency room or call 911.


Please, reach out when you need to and listen to others when you can. Let’s all take care of each other.


Tuesday
Jun122018

Meet Your Support Team!

It’s tradeshow season! (Actually, it’s always tradeshow season.) But we’re excited to be able to meet with you face-to-face whenever we can.

Let’s make progress together from June 20-22

This month, you can visit us at Canada’s Farm Progress Show in Regina. We’ll be answering your questions from 9 a.m. – 5 p.m. every day of the show. You can also get a demo of AgExpert Field, the new farm management software that’s seriously easy to use.

AgExpert Booth

Eventplex Hall 7, south side

Let’s talk soon

If you can’t make it to this show, look for the AgExpert Booth at other shows throughout the country all year long. We’re always happy to see you.

Tuesday
May152018

How do you pay employees for statutory holidays?

As an employer, figuring out how to pay your employees for statutory holidays can seem like a tall order. Who’s eligible? How much they are entitled to? The payroll module in AgExpert Analyst handles the bulk of your payroll calculations, but stat pay will require some manual work. Here’s a quick guide for you:


Know the rules for your province

In most provinces, producers are exempt from paying stat pay. In exempt provinces, producers may still choose to pay stat pay. If you're unsure what your obligations are, check with your accountant or call your local labour standards branch.

British Columbia – 1-800-663-3316
Alberta – 1-877-427-3731
Saskatchewan – 1-800-667-1783
Manitoba – 1-800-821-4307
Ontario – 1-800-531-5551
Quebec – 1-844-838-0808
Newfoundland and Labrador – (page 14 ) 1-877-563-1063
Prince Edward Island – 1-800-333-4362  
Nova Scotia – 1-888-315-0110
New Brunswick – 1-888-452-2687
Yukon – 1-867-667-5944 
Northwest Territories – Check out page 21 of the Employment Standards FAQ PDF 1-888-700-5707 
Nunavut – 1-877-806-8402 


Here’s an example of how to calculate stat pay in Saskatchewan

Let’s say John Doe makes $1,375.20/week. He is paid monthly and a stat holiday falls within the current pay period. To calculate John’s stat pay, we’ll use this calculation:

Regular wages: $1,375.20 x 4 weeks = $5,500.80
Stat pay = Total earning divided by the number of days worked

Full-time employees work 5 days every week.
$5,500.80 divided by 20 = $275.04

Essentially, we’re figuring out his average daily wage, or if you prefer, his average daily hours.


How to setup stat pay in AgExpert Analyst

  1. First, go to the Payroll menu and select Setup. In the payroll setup screen, click on Pay Types. Select Add and enter the information for Stat Pay. Save your changes. 

  2. Now you’ll add the stat pay to your employee. Go to Employees/ROE, highlight your employee and click Edit. 

  3. Next, select the Pay Types, Benefits and Deductions tab. Click on the binoculars to the left of Pay types and select Stat Pay. If your employees are paid hourly, type in the average hours on the stat pay line. If they have a salary, leave it at zero. Save your changes. 

  4. To pay your employees stat pay, go to the Payroll menu and Create Paycheques. Enter the payroll information as usual. When paying stat pay, enter the average hours worked and the rate at which they’re paid. 


Tuesday
Apr172018

Is your inventory set up properly?

Tracking your inventory is important. And if you're tracking for AgriStability, so is the way that you set up your inventory accounts. But don't be intimidated. We'll take it step by step to make it simple.

Manage your details with AgExpert Analyst

When you created your data file, you chose which commodities to have. Fast forward a few years. Now let’s say you’ve decided to start growing peas as well. How are you going to add peas to your inventory? Just follow these steps:

  1. First, add the inventory account. Go to the Setup menu and select Chart of Accounts. Under the asset tab, scroll until you find your Pulse inventory. Highlight the Pulse Inventory account (Primary account) and click the Add button.

  2. Create a sub account for the variety of peas that you want to plant. The account class will be Sub Account and select Create Account. Select Yes to the pop-up that appears. Make sure to select the Unit label, Inventory adjustment account and the AgriStability commodity type.

  3. Now you’ll add the income and expense accounts and link them both to our inventory account. Let’s start with the income account.

    Click on the Income tab and go to the Pulse sales header account. Add a Primary account called Pea Sales.

  4. Using the same account number as your primary account (4121), add a sub account for Peas – yellow sales. Click on the blue book beside Inventory account to select our Peas – yellow account.

  5. Moving to the expense tab, add Pea seed purchases as a primary account and Peas – yellow as a sub account.


Now that you know how to set up your inventory, whether you use it to track detailed inventory for AgriStability or to keep track of your inventory. At year-end you can be confident that your data is correct.

AgExpert Analyst Tips

  • Make sure that when creating accounts all fields are filled in.
  • If you are unsure of what AgriStability codes to use, ask your accountant or check online.
  • An easy way to link your income/expense accounts to your inventory accounts use the Setup Inventory Accounts window, which you’ll find in the Inventory menu, then choose inventory setup.


Thursday
Mar222018

Are you ready for your financial year-end?

The Canada Revenue Agency deadline for filing your income tax is April 30, which is right around the corner. Make your life – and your accountant’s – easier with AgExpert Analyst, and make sure you’re ready to file.

Go at your own pace

You can move into the new year when you’re ready. AgExpert Analyst has a perpetual database system and no actual Year-End button. Does your accountant work in AgExpert Analyst at year-end? Easy. Use the Accountant’s Copy feature to send your data to your accountant so that they can work on the old year while you work in the new year. When they’re finished, you can import their changes into your working copy to update your balances appropriately. How do you enter the accountant’s adjustments manually? Also easy. Here are a few things to remember:

  • You can adjust inventory value and quantity, but the math must match. Debits must have positive quantities, credits must have negative quantities.
  • You can adjust value using Debit or Credit and leave the Quantity as zero (new in 2017). This rule is true only if the account is not at zero prior to, or after the adjustment is recorded. (See the next two points).
  • If inventory is currently at zero and you’re debiting to increase inventory, you must put a quantity on that line. You may not know what the correct quantity is, so make your best guess based on what you think the value per unit might be. The logic: you can’t have a positive value if there’s nothing on hand.
  • If zeroing out the inventory, you must zero out the quantity as well. If there are 3 units of inventory valued at $300 and you want to credit (-) the inventory account by $300, then you’ll need enter negative 3 as the quantity on that line.
  • You can only back out what is currently on hand. For example, at year-end, there are 3 units of inventory valued at $300 if you did a bit of work in the new year before sending your books to your accountant and sold 2 of those inventory units so “current” inventory is 1 valued at $100. In that case, you can’t back out $300 at year-end because that would make “current” inventory a negative $200. The easiest solution is to enter $200 worth of inventory on to the account in the new year to give you the room required to remove $300 in the old year.
  • To enter adjustments against AR Customers or A/P Suppliers, use the regular transaction entry window to create a Receivable Charge (1200-00) or Payable Charge (2100-00).

How to: Create your accountant’s copy

  1. Add your next fiscal year so that you can continue working in your books. Go to Setup and Fiscal Years. Click Add Fiscal Year.

  2. Close the Fiscal Years window and go to File and Create Accountant’s Copy.

  3. Set the dividing date as the last day of your fiscal year. You can view anything before the dividing date, but cannot edit. Your accountant will have access to everything before that dividing date to work on your year-end. You can continue your books after the dividing and your accountant can view the data but cannot make any changes. 

  4. Select the save location for your Accountant’s Copy. Click on the yellow folder in step 3. Save it to the desktop so that it’s easy to attach to an email. You’ll either see “this PC” or “computer.” Click whichever one you see, then click on Desktop and Data. Click OK and save.


  5. You'll see this icon on your desktop with the extension .agacctransfer to send to your accountant.

Year-End tips in AgExpert Analyst

  • If year-end has your head spinning, check out this handy list of 9 tasks to wrap up your fiscal year.
  • A file with the extension .agacctransfer goes to your accountant. The file extension .agextransfer comes back from your accountant once the entries are complete.
  • Top Tip 1 Do not undo the Accountant’s Copy. If it’s undone, you won’t be able to import the data your accountant sends back to you.
  • If your accountant doesn’t have AgExpert Analyst, you can print or export the required reports.
  • Top Tip 2 Always add your next fiscal year before creating the Accountant’s Copy.


Tuesday
Feb202018

It's very practical... AgExpert Field 02/22/2018


The easy way to manage your farm

AgExpert Field is now available. Track your records, and get the details you need to make the best business decisions. AgExpert Field is web-based software, which means your records are secure. You choose who can access them.


What does it look like?

  • It’s seriously easy to use.
  • AgExpert Field lets you enter and access your info any time, anywhere.
  • Analyze your data, plan your strategy, then track your performance.   
  • Easily share your information with the people you choose.

Premium users can migrate their data from Field Manager PRO to AgExpert Field. Watch the video below for a how-to.


Practically speaking

Let’s look at how to sign-up for AgExpert Field.

  1. Visit AgExpert.ca. Sign up for a new account. If you’re a current Field Manager PRO Mobile user, your username and password won’t be recognized, so you’ll sign up for a new account too.

  2. Enter your information. Click Create.

  3. You’ll receive an email to confirm and activate your account. Once you click Confirm, you’ll return to the AgExpert Field sign-in page.
  4. Once you sign in, you’ll see a message saying that your account has been confirmed. Click Continue.

  5. Enter your business or farm name and your phone number. If you’re a current Field Manager PRO user, you can migrate your data into AgExpert Field. You will only receive this message once.
     
  6. Once you click Save, you’ll be asked if you want a tutorial of how to start using AgExpert Field. If so, click Add a field. If not, select Exit tutorial.


Best practices


  • As with any new software, AgExpert Field may have a few bugs. If you notice an error, call our Support Team at 1-800-667-7893. Please mention what error message you received and we’ll clean it up as soon as possible.
  • Get the latest news about AgExpert Field on our Online Community.
  • You can try the Basic version for free, or upgrade to Premium for additional features and support.
  • Top Tip If you have a current service plan for Field Manager PRO or AgExpert Analyst, you’ll automatically receive Premium access for your first year. Make sure to sign up with the email address you have already registered with us.
  • Have a suggestion about what you’d like to see in AgExpert Field? Visit ideas.field.agexpert.ca and let us know.


Tuesday
Jan232018

It's very practical... Accrued Interest

There have been some changes made to the look of FCC Statements. The major change that has been made to the crop input transaction statement is that the statement will no longer show the monthly accrued interest for each individual month. You will now see the cumulative balance of your accrued interest each month. Some concern may arise from these changes and this blog is here to help answer any questions you might have.

What does it look like?

  • The accrued interest on your crop input transaction statement will now show as a cumulative balance at the end of the statement period.
  • To determine the accrued interest for one month you will need that month’s statement and the statement of the month prior.
  • The cross-over from the old statement format to the new statement format will be a different, one-time, calculation.

Practically speaking

Let’s look at how to enter your transactions into AgExpert Analyst.

  1. The accrued interest from the old format to the new format will be calculated by subtracting the September accrued interest from the August accrued interest.


  2. The new format now shows the total cumulative accrued interest instead of what your accrued interest is for each individual month. To calculate the monthly accrued interest for October you will need both September’s statement and October’s.


  3. Pay accrued interest on your crop input loan.
  4. Annually, you will receive a loan statement that will show what interest was actually posted to your account that fiscal year.  You will need to do a year end adjusting entry once you receive this statement. Once the adjustment is complete, the ending balance on your loan statement should match the balance on your loan account in AgExpert Analyst.

Best Practices

  • Don’t panic, if you have any questions or need any assistance we are always here to help.
  • Keep your crop input transaction statements organized so that you have everything you need to make the month-to-month calculations.
  • Top Tip - Please refer to www.fcc-fac.ca/statements  for more information about both the Transaction Statement and the Annual Loan Statement. You can also call the Customer Service Centre at 1-888-522-2555.
  • In reconciling your loan every month, you no longer reconcile against a single loan statement balance. You will now reconcile your accrued interest balance against your accumulated interest FCC input loan payable account and the closing balance to your loan account.
Tuesday
Dec052017

It's very practical... Cash Flow


It’s easy to know how much cash you have on hand today. Just open the banking app on your phone – and there it is. What it won’t do is show you how much cash you’re going to have in the future. The cash flow module in AgExpert Analyst allows you to do just that. When funds are tight, this tool can help you walk that tight rope successfully. Will you have enough on hand in March to make that loan payment? With the cash flow module, you can rest easy knowing that you’ve got it covered.

What does it look like?

A basic cash flow report is easy to create.

  • The Cash Flow module takes your starting cash position, then helps you forecast future inflows and outflows.
  • You can set it up based on numbers that already exist – then tweak the forecast to make it even more accurate.
  • To keep it simple, AgExpert Analyst uses the indirect method for cash flow statements.

Practically Speaking

Let’s look at how to set up cash flow and what you can do.

  1. Projection vs Actual

    Projection allows you to manually manipulate your cash flow. You can edit fields to predict what you
    should expect to be your cash inflows and outflows over a period of time (monthly, quarterly, yearly).

    Actual will show you exactly what you have today based on real life transactions that have been recorded in AgExpert Analyst. When producing an actual cash flow statement, you cannot edit any field.
  2. To set up your projections, collect information about your transactions from previous years. Account for factors that could change each year: price fluctuations, environmental conditions, or inflation. Once you have gathered information from past years, you can begin to complete your monthly projections.
  3. In the Setup menu, ensure that all your listed accounts are linked to cash flow sections. If you don’t like how your accounts are linked, simply highlight the account, and select the cash flow section you want it to report to and click Save.
  4. In the View tab you can decide if you wish to include last year’s numbers and current inventory. Keep in mind that inventory balances are for projection purposes only and will not show on an actual cash flow report. 
     
  5. The Auto fill option is a way to either automatically fill a row, a column, or the entire worksheet. This option is only available for a projected cash flow because the actual will pull from your transaction entries. We like to start by auto filling the entire worksheet.

Best Practices

  • Don’t confuse budget with cash flow. A budget is aspirational – it’s what you hope is going to happen. Cash flow is reality – it’s the biography of how money moves in and out of your account.
  • Review your cash flow periodically to make sure your projections are on track.
  • Top Tip: To keep your cash flow statement accurate, reconcile your bank regularly.    
  • If cash on hand seems to be particularly high and the funds are not required in the immediate future, it may be appropriate to consider making some short-term investments.


Monday
Oct162017

It's very practical... Capital Assets

Keeping good records of your capital assets is important and we recognize that there may be road blocks. You may feel like it takes too much time or maybe that it’s too complicated and you aren’t quite sure how to do it. Some of the reasons why it’s worth the extra effort are:


  • Quickly generate a list of current capital assets for insurance purposes, and maintain a list of historical capital assets as part of your financial records.
  • Calculate and post your capital cost allowance.
  • Calculate depreciation for management reporting using five different methods.
  • Ensure your Net Worth Report is accurate.
  • Automating your capital asset records helps to keep you organized and efficient. 

What does it look like?

Capital assets are tracked in four ways in AgExpert Analyst. 

  1. The Balance Sheet tracks your assets by class and reports the total for each class as well as the accumulated depreciation in separate accounts.
  2. The Capital Asset listing (Setup > Capital Assets) tracks the details of each asset individually.
  3. The CCA/Depreciation module allows you to calculate your capital cost allowance for tax purposes.
  4. The Net Worth report allows you to track the Fair Market Value for each asset over time. 

The info-graphic and story below demonstrate how AgExpert Analyst ties the first three together. 


Let’s walk through a real life example. Jane just bought a new grain bin for $30,000 and enters it into AgExpert Analyst. The program will increase account 1820-00 by $30,000 and record the serial number, purchase date and original cost to her capital asset listing. Also, her CCA Schedule will update to reflect the $30,000 addition and forecast the depreciation using the half-rate rule.


The fourth way, tracking Fair Market Value (FMV), allows you to easily generate an accurate Net Worth report. Check out the video below to learn more about Fair Market Value with Steven Tippe from the FCC Customer Care Team.


Practically Speaking

Let’s walk through a few transactions dealing with capital assets and some scenarios you're likely to encounter.


  1. You finance a new capital asset purchase (tractor) and trade in an old one. You also put a deposit on the purchase at an earlier date. First, we need to enter the deposit.


    Once that's taken care of, we can enter the 2nd payment and take care of the capital asset purchase.


    When you’re entering a C+ line, AgExpert Analyst gives you a supplemental window where you
    can enter the details of the capital asset. (Pro tip: if you accidentally close this window, just          
    click on the  at the end of the C+ row to get the window back.


  2. A hail storm damages your truck so extensively that the insurance company decides to write it off. When you receive the cheque, you enter a deposit (not a withdrawal) into AgExpert Analyst.


  3. You sell a half-share of your potato planter to Jim. Before you can enter the capital asset sale, you need to split your capital asset in two.


    Once you've got the capital asset split, you can then sell off the one you labelled as "1/2 Share."

  4. When building a capital asset, you can place all expenses incurred throughout the project into a work in progress account to convert into a capital asset when the project is complete. This will be recorded with two separate transaction entries.


    (If you know the GST, you can record that as a separate A+ line to the GST Paid account.)

    When Joe’s Contracting issues their final invoice, all that’s left owing is $3,500.


  5. At year-end, the accountant reviews your books and informs you that the tractor you purchased and entered as class 8 should actually be class 10. To enter this into AgExpert Analyst, simply locate the original transaction, click on Full Edit, delete the original C+ line and record a new C+ line to the correct capital asset account.


  6. Record year-end depreciation in the General Journal. You’ll find the numbers you need for this transaction in column 9 of the CCA/Depreciation report.


Best Practices


  • All passenger vehicles are considered Class 10.1 rather than Class 10. This means that the maximum claimable GST on the purchase is $1,500. Any remaining GST should be included in the Original Cost field of the Add Capital Asset window.
  • Top Tip - Every time you add a new fiscal year or you receive your tax package back from the accountant, set the beginning balance for the year in the CCA/Depreciation window.
  • When reviewing your Income and Expense report as you approach year-end, set the Depreciation to either User or Maximum to include a depreciation expense forecast on the report. This will give you an idea of what your real bottom line will look like.
  • Review and set new FMV amounts at least once per year to ensure that your Net Worth statement is relatively current. And it never hurts to update it more frequently too.


Friday
Sep082017

It’s very practical…. Accounts Payable 

Using Accounts Payable to record expenses? It may not be necessary for everyone, but there are benefits to consider:

  1. Accuracy – Report expenses when they’re incurred rather than waiting until they are paid, which makes your books more accurate. 
  2. Simplicity – Record all expenses through a single account for audit and reconciliation tasks.
  3. Efficiency – Streamline accounting processes (printing cheques en masse rather than one by one), making cash flows more predictable.
  4. Security – Use Accounts Payable to segregate accounting duties, which reduces the chance of fraud.

What does it look like?

Essentially, we’re talking about cash reporting vs. accrual reporting. By using Accounts Payable, you can easily report your income and expenses with the accrual method of accounting if necessary. You can also use a special set of line types in your transaction entry window: CN+ and CN- (credit notes). You can see them in the transactions below.

Learn more about CN+ and CN- with Steve Tippe from the FCC Software Customer Care Team

In AgExpert Analyst, you can take some of the adjustment work out of the typical process. You can let the Income and Expense Report and the General Ledger Report be generated by either the accrual or cash method of accounting automatically. The accrual version includes expenses that are currently unpaid in Accounts Payable; the cash version ignores those outstanding items. You have the best of both worlds. Report expenses in a way that makes sense for your business management and still easily convert those reported expenses to the cash method for income tax reporting.

Practically Speaking

Let’s run through a full transaction cycle for a supplier.

  1. Put a deposit down on next year’s inputs. By using a credit note into Accounts Payable, you defer the expense to next year. Because no expense has been posted, no expense will be reported in 2017.
  2. In the new year, after picking up fertilizer from the supplier, you can enter the invoice as a Payable Charge. Note that at this point, no additional cash is changing hands. The accrual reports show the $10,000 expense in March, even though you haven’t paid yet.
  3. By applying the 2017 credit note entry against the outstanding $10,000 invoice, the cash report will now show a $5,000 expense. Important: the only way to use a balance entered as CN+ is to have an offsetting CN-. Amounts entered as credit notes do not count as charges.
  4. Sometimes you’ll return a purchased product to the vendor for credit. In those cases, enter the return as a negative Payable Charge instead of using CN+. This will record the proper credit to the expense account. In this same vein, you can enter overpayments as negative payable charges if you’d like to see the activity in your Aged or Charge Reconciliation reports.
  5. Finally, it’s time to pay the remaining outstanding balance on the account. When applying the payment, it’s important to apply it against both the return and the remaining balance from the original invoice.
  6. If you leave the balance unpaid past the end of the next reporting period, typically the fiscal year-end, make sure to update Accounts Payable to reflect that there’s only a remaining $4,000 balance from the original invoice. (Apply the return against the remaining invoice balance.) By doing this, you ensure that your Accounts Payable Aging and Charge Reconciliation reports are correct.

Best Practices


  • Set up cheque printing and then establish a cheque run schedule and stick to it as best you can. There will always be items that can’t wait until the 15th or the end of the month – sometimes not even until next Thursday. Just take care of those few items with a handwritten cheque and then make the transaction entry into the program when you’re next sitting down at the computer.
  • Post your invoices frequently. Not having a stack of papers with due invoices waiting for you on the desk is a wonderful feeling.
  • Periodically reconcile your busiest accounts to your vendor statements to make sure that nothing has been missed. The Accounts Payable Charge Reconciliation report is a favourite of ours for this because it matches the invoices entered with the payments that have been applied against them.
  • Top Tip – Review all outstanding items as part of your Year-End process. The Accounts Payable Aged report works great. Make sure that the outstanding items really are outstanding. For instance, you may have a credit note or a return credit outstanding that brings an account down to a $0.00 balance, but if the credit and the invoice it zeroes are both outstanding, the expenses related to those items will not report correctly. Clear them against each other using the method demonstrated in transaction #6.
  • Apply the same principles and practices to your income by using Accounts Receivable.


Thursday
Aug172017

Happy Birthday to us!


Our Online Community turned 5 this year

Thanks for making this community possible. You’re the reason we’ve been able to help thousands of software users get the answers they need.


Check out the changes over the years


You’re part of a growing community

You have access to a knowledge base that started at a modest 72 articles. Today, there are 638! That’s a lot of great info with answers to your questions. We average 6,000 visits per month by more than 4,000 software users like you.


Look for big things in the future

On Twitter? Keep an eye out for tweets from our new account coming soon. We’re also working on a new multimedia Tip of the Month. You’ll go beyond basic how-to instructions and dig into specific solutions to your issues.


Thanks again for being part of the FCC Software Online Community.


Monday
Mar062017

Demystifying year-end with AgExpert Analyst

Demystifying year-end with AgExpert Analyst

The CRA tax deadline is April 30 and like most people, you’re probably wrapping things up and submitting your books to the accountant. This is where AgExpert Analyst can really step up your game with a feature known as the Accountant’s Copy.

Create a seamless transition between you and your accountant.

Using the Accountant’s Copy allows two different users to make entries into two different years in a file at the same time. The accountant reviews and makes adjusting entries to the year being closed, while you continue into the new year, entering transactions so you don’t get behind. 

When your accountant is finished with their review and entries, they can send a specific file back to you. You can import the accountant’s changes into your file, updating closing balances for the fiscal year just past and the opening balances for the current year.

Here’s the step-by-step process on working with the Accountant’s Copy:

1. Start with your working copy of the AgExpert Analyst data (File type/extension “.agex”). You (Client user) have finished all entries and tasks for the current fiscal year and are ready to send the books to the accountant for review and income tax completion. Your accountant also uses AgExpert Analyst and typically enters any adjustments required to the file on your behalf.
2. You click on the File menu and choose Create Accountant’s Copy. Establish a dividing date that matches up to the end of the year you’re sending to your accountant for review. Then, click Save. You’ve just created two files on your computer:

a.  “.agex”  The Client user working copy for new year entries.
b.  ".agacctransfer” The AgExpert Accountant Transfer file to be sent to the accountant user. This      file can be moved to a memory stick and sent in or attached to an email.

After sending in the transfer file, you can continue working on the new year until you hear back from your accountant.
3. When your accountant receives the “.agacctransfer” file, they can import that file into AgExpert Analyst (Accountant menu > Import Clients Copy). This will create an “.agacc” file they can review and make changes to. 
4. When your accountant is finished, they can export their information back to you (Accountant menu > Export Clients Copy). This creates an “.agextransfer” file that can be emailed or sent to you.
5. When you receive the .agextransfer file, import that file into your books (File menu > Import Accountants Copy). This will insert the accountant’s changes as well as print out a summary of those changes for your review.

Once finished, you’ve completed the entire Accountant’s Copy process. Now you can carry on with your .agex file until next time you need to send the books in for review.

Questions? Get answers and share your comments with other software users on our Discussion Boards or search the Knowledge Base. Plus, our FCC Management Software support staff is always just a click away.

Wednesday
Feb082017

How to submit payroll files to CRA – the easy way

How to submit payroll files to CRA – the easy way.


It’s that time of year again…tax time. If you have employees, there are a few things you need to know about remitting payroll information from AgExpert Analyst to Canada Revenue Agency (CRA).

As you know, T4’s are due in employee’s hands by the last day of February each year. CRA also has the same deadline for submitting the T4’s and T4 summary reports to them. You can find instructions for generating and printing your T4’s in our Knowledge Base . 

As soon as you’ve entered your last paycheque and sent in the final remittance, AgExpert Analyst has your T4’s ready to go. From here, you have two options for submitting your payroll files to CRA – online or by mail.

Submitting payroll tax forms online

Mail is no longer the only option or even the best option. CRA and Revenu Québec allow employers to upload year-end payroll reports directly through their websites, which can speed up the process immensely.

If you wish to file your forms electronically, it couldn’t be easier. AgExpert Analyst will create an XML file that is accepted by both agencies. Simply check the box to create an XML file in the Report Console window. The program will allow you to preview your forms on the screen before creating and saving the file in the location of your choice.

To submit the file to CRA, you will need to obtain a web access code here . To submit to Revenu Québec, you will need to register with clicSÉQUR.  Note that the clicSÉQUR service is only available in French, but most web browsers can translate to your language of choice.

After you’ve gotten your credentials ready to go, sign in to the electronic submission service using the links below.

Submit T4’s to CRA 
Submit RL-1’s to Revenu Québec

Submitting payroll tax forms by mail

To submit your payroll by mail, print your reports and forms, sign and mail them to CRA at: 

               Ottawa Technology Centre
               875 Heron Road
               Ottawa, ON  K1A 1A2

If you are an employer in Quebec, you will also need to file the RL-1 and RL-1 Summary forms by the same deadline. You can find instructions for generating and printing your RL-1’s in our Knowledge Base.

If you live in Québec, print your reports and forms, sign and mail them to Revenu Québec at:

Revenu Québec
C.P. 6700, succursale Place-Desjardins
Montréal (Québec) G1A 1B6

 Note: If you are in Montréal, Laval, Laurentides, Lanaudière or Montérégie, mail your forms to:

Revenu Québec
3800, rue de Marly
C. P. 25666, succursale Terminus
Québec (Québec)  G1A 1B6

Thursday
Dec292016

AgExpert Analyst 2017-01 is here!

AgExpert Analyst 2017-01 is here!

We’re excited to let you know the newest version of AgExpert Analyst is now available. And, to save you time, the software update will automatically install when you’re connected to the internet.  If you don’t have an internet connection, let us know and we’ll send you the manual update download link.


Some of the new features and enhancements, include:


  • We’ve updated the payroll tables from January 1, 2017 to June 30, 2017. 
    • Make sure to update your employees’ TD1 numbers as AgExpert Analyst does not update this information for you. 
    • The income tax calculation has changed for Quebec residents. Make sure to wait to install this update until after your December payroll has been processed to avoid any employee income tax miscalculations.
  • If you have GST, PST or payroll that is unremitted when you create a new fiscal year, a warning will open to let you know that it still has to be done. Click ‘Yes’ to continue creating the next fiscal year or ‘No’ to enter the remittances right away. Note that if you click ‘Yes’, you can still set your fiscal year back to the prior year and save those remittances.
  • The suppliers and customers that you add to transactions will now appear on the General Ledger Report. This will allow you to see your contacts even if you don’t enter contact names into your memos.
  • A column has been added to the Edit/Reverse Transaction screen to allow you to more easily access the images you’ve imported with a receipt from AgExpert Mobile.


To learn more about all the new features and enhancements click here


Thursday
Jul212016

Thanks for helping improve Field Manager PRO 2016-02

Thanks for helping improve Field Manager PRO 2016-02


Our software is designed to help make your job easier, for improved results in your operation. You’ve provided us with great feedback and offered suggestions to make our software even better.

Thanks to your recommendations, we’re happy to provide our latest update, Field Manager PRO 2016-02 – new and improved by you.

What’s new for this update? Well, if any of these bugs happened to you before, the new update means they won’t happen again:

Fixes for Field Manager PRO


  • Setup – Default Application Rate for seed treatments gives sync error if the measurement unit is not an Area
  • Reports – CanadaGAP H1 form is missing records between pages


Fixes for Field Manager PRO 360


  • CNH fertilizer/spray operations adding an extra zero to area in bulk import
  • Importing a .shp file boundary crashes if language is set to French
  • CNH harvests showing no yield in bulk import
  • JD 2600 Data not importing product name


Fix for FM PRO Mobile


  • now you can our install the Android app on an RCA tablet without errors


Questions? Get answers and share your comments with other software users on our Discussion Boards or search the Knowledge Base. Plus, our FCC Management Software support staff is always just a click away.